In

Make Up Forever Ultra HD Foundation Stick Review


Here's my face, with it on......


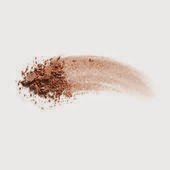
Can I get a hallelujah because honeeyyyyy, I've found the holy grail foundation.

Recently I had struggled with some pretty serious break outs due to coming off the pill (I'm talking actual break outs, not the kind where they're like 'guys I need to cover some acne' and by that they mean two pin size red dots). This lead to a blood thirsty hunt for the most high cover foundation I could find. I remembered back to when my skin was as clear as my conscience pre-uni, back to when I loved the Make Up Forever Ultra HD Foundation, it's such a beautiful finish, but I needed something more high coverage than that! Que watching one to many Nikkie Tutorials and Jeffree Star videos and I was sold on the Make Up Forever Ultra HD Foundation Stick.

I spoke to the make-up artist, who told me that essentially one layer of the foundation stick equates to about two layers of the liquid version. He did, however, mention that the liquid foundation was much better suited to oily skinned gals and guys, whereas the foundation stick would be better for the normal to dry skin people out there. I can fully support that statement (which we'll get to in a minute).

The product retails for £29, and you get your standard 30ml. Is it worth it? Umm yes.

What I mainly love about this foundation are two things, it's coverage and it's finish. This foundation has amazing coverage, it covered all my redness and my acne scars, one thing to note is that because it is quite high coverage it's important that you get the right shade (I am shade 153). The finish on this foundation is one that I have yet to find in any other foundation, you literally glow, it's such a reflecting foundation that even if there was a slight bit of pigmentation showing, as soon as light hit it it wouldn't be visible anymore. This is honestly jut the best finish I've ever found in a foundation and it translates beautifully in all lighting, as well as in photos.

Of course nothing is absolutely perfect, so there are some slight downfalls to this foundation. The first is that this foundation runs out mega fast, at first I thought it was just me, but after having read up on it a little it does seem to be noticeable. I don't know the cause of this but my guess would be because of the solid form of the foundation. After using this every day I can confidently say that it ran out substantially faster than my other foundations, and at £29 per pop it's not exactly something that fine to pick up every few weeks. So this might be one to pop to side for special occasions, or even mix with a cheaper counterpart. The second is that this foundation is straight up going to need heavy powdering if you have oily skin, I remember when I originally purchased this foundation I didn't powder one day and I literally turn into an oil slick by the end of the day, now because of the beautiful finish of this foundation I was able to pull it off as more of a ridiculous glow, but yeah, I have normal skin so I can't even imagine what that would have looked like on someone oilier than me!!

So there it is! I absolutely love this product, and it's definitely one I will always come back to!


 I hope this review was helpful! Let me know if you've purchased this foundation and what you thought!


xxxx


Read More

Share Tweet Pin It +1

0 Comments

In

How To Survive Uni: The Series By a Professional Uni-er


So I was sat thinking to myself the other day, I wonder what sort of tips I would have liked to have known before I went to uni. I know not everyone has a brother or sister that can help them out, and let's be honest, your current place of education is just telling you about documents and working hard - and let me tell you there none of that happening in first year. I'd like to cover not just the essential tips like 'what should you pack' (which I will), but the small things that matter a lot as well, like the social side, the lecture side, the drinking until you don't know what you study or who you are as a person side, and the being a broke ass bitch side (that's the financial side). 

So I'm going to write a series of blog posts covering everything that I can think of to prepare you as best as possible for uni! It's important to remember that everyone's experience is different so go with the flow, these are just some things to guide you if needed!

(It's also important to note that I am one of those people that gives great advice but doesn't follow my own)

I'm going to post about each aspect weekly in an order that you'll probably encounter when you get there:

1) The Boring Important Stuff

2) Social Side

3) The Financial Side

4) The Academic Side

I really hope that these posts will serve not just for entertainment purposes but also help anyone out that might have some questions about uni! 

(Plus you can learn from my mistakes, I know, so selfless, I suppose someone has to make them) 


Read More

Share Tweet Pin It +1

0 Comments

In

Long Time No See


Here's me with my favourite filter of all time and I don't care if it's the hoe filter it's damn best one


Okay I'm a terrible human being


I don't know where time has gone, but apparently it's gone two years already because my last post was essentially this time 2014 and that's a little bit crazy to me because so much has changed!! In fact here is a list of things:

  1. I'm at uni, (hangover rate: 80%, Gym rate: 20(ish)%)
  2. I have black hair (minor detail really but worth mentioning)
  3. And perhaps the most significant change, I don't eat anything animal-like anymore AKA I eat a plant-based diet (I say plant-based and not vegan because I'm still making the transition to cruelty-free products) 
  4. Beyonce released Lemonade and I lost my shit 
I think those are the most important things for now, I really am going to put my mind to this blog now because in August I'm going to be moving to Germany to do a year abroad (studying through half of it and working the other half), and during this time I really want to vlog and post them to my blog regularly. I bloody love watching vlogs because I'm nosey af, so hopefully there are a few fellow nosey's out there that might take an interest into my life!

But yeah, that's all for now! See you soon!


xx


Read More

Share Tweet Pin It +1

0 Comments

In

NARS Laguna Bronzer Review


I'll be the first to admit that I was never one for bronzer, I was always unsure of how it would look, and I just didn't get it. However I thought I would give it a try and so for Christmas I placed the cult favourite NARS Laguna Bronzer on my wishlist....
And it's now safe to say I'm converted and my daily face just simply cannot go bronzer free, now I get it, it makes your face appear slimmer and just gives you that healthy glow. One of the other reasons that I was never really that into bronzer is because the one I tried (Bourjois' Chocolate Bronzer) broke me out, after using it for a while I would find a little trail of spots where I'd usually apply it - like Hansel and Gretel, but not cute. And I think that's why I fell in love with Laguna because there was no such effect!

Although at £27.50 this bronzer is a bit more on the pricey side I can honestly say that it's worth every penny! You get a good amount for your buck, and the finish of this bronzer is just so beautiful, it's not orange or too red-brown, it's that perfect 'I've just come back from holiday' shade! It does have little bit of shimmer to it, but not stand-outish at all, just enough to give a lovely glow. Apply to the areas that would naturally be hit by the sun, so the forehead, bridge of nose, tops of cheeks, and chin for a healthy glow or specifically in the hollows of your cheekbones to get dat carved goddess look.

 I received this at Christmas and (as you'll see from the pictures) it's now basically empty (sob!), and I'll definitely be re-purchasing this beauty!

If you're new to bronzing or looking for that higher-end product, then I cannot recommend this any more- it's a fool proof contouring gift!


Sadly there wasn't enough left in mine to swatch it :(- so here's the swatch from the official NARS website!
http://narscosmetics.co.uk/en_GB/irr%C3%A9sistiblement-bronzing-powder/0607845051039.html


xx


Read More

Share Tweet Pin It +1

0 Comments

In

FOTD


Yaaassssss, it's that time - a face of the day!

I've been sporting this quite tanned, glowy look for a bit now so I thought I would talk through the look, and the products I use to get it! I've been using some different products recently, some are new and some are re-purchased classics that I love!

For my base I used Revlon's new Airbrush Effect Foundation, I was a bit apprehensive about this one, but it's actually turned out to be a little gem! I'm thinking of writing a review about it- so more details to follow! To cover up those dammed dark circles of mine I used Maybelline's Dream Lumi concealer- again at first I was a little cautious of this because I didn't know if it was going to give sufficient coverage- but yet again I was pleasantly surprised, I use shade 02 which is a shade lighter than my skin and it gives great coverage and brightness to conceal those buggars! Then to cover up any blemishes I used Collection's Lasting Perfection Concealer.

For the eyes I used my Iconic Pro 2 Palette from Revolution, and having prepped my eyelids with MUA's Pro Base Eye Primer I used the shade Chase as a base and patted the shade Awaken over the top to give it a nice shimmer. These are definately two of my favourite shades from the palette, they are just so lovely and summery and fit in perfectly if you're going for a tanned look! As mascara I used Maybelline's The Falsies- again, another gem that I keep on purchasing then neglecting, but this time it's here to stay. To keep the brows on fleek I used MAC's brow pencil in Lingering, and set them with MUA's clear mascara!

The finishing touches consisted of a swirl of NARS Laguna Bronzer (my holy grail), the new love of my life AKA MAC's Soft and Gentle Skinfinish, Rimmel Stay Matte's Powder in Transparent, and to finish everything off I lined my lips with MAC's Boldly Bare lip liner!


So that's it for my Face of The Day! I hope you liked it!


xx


Read More

Share Tweet Pin It +1

2 Comments

In

The M.A.C Lipstick: Dreaming Dahlia


Ladies and gentlemen: My first ever M.A.C Lipstick purchase!


Whilst in London yesterday I picked up the M.A.C Lustre Lipstick in 'Dreaming Dahlia', I'd never purchased a lipstick from them before, so I was really excited to get my hands on this one! The colour is a gorgeous orange with a hint of red, and has a beautiful pigmentation, it's got a lovely sheer finish to it, but still has that pop of colour. I thought this will be perfect for the summer, paired with brown liner softly smudged around the eyes!


Just a quick little post to express my excitement at this purchase! :)


Read More

Share Tweet Pin It +1

2 Comments

In

Face Time: The Base


So I thought I would start a new weekly post series called 'Face Time' where I would talk about my favourite products of the week, for individual parts of my make up! So eyes, lips, cheeks etc! And first of all is 'The Base'.


'The Base' in action


So, onto the good stuff...


1- The Foundation: The favourite of the week, and most likely for the last year is the Revlon Nearly Naked Foundation. Because I have dry skin this foundation is just perfect for me, it leaves a lovely dewy, natural finish, but still with a medium coverage! Bonus. This perhaps isn't one for oil skin gals, but the Revlon 24hr Colourstay Foundation might be just great!


2- The Highlighter: A newer purchase takes first place for this one, and it's the M.A.C Prep + Prime Highlighter in 'Light Boost'- and where would I be without it? In dark-circle-central most likely! I pop this under my eyes, the bridge of my nose and cheekbones to brighten and bring them forward - lurvley. 

3- The Concealer: Oooohhhh the trusty concealer! My current disguiser of choice is split between the M.A.C Pro-Longwear concealer in NW20, or the the Bobbi Brown Creamy Concealer in 'Sand', both give great coverage, but the Bobbi Brown is definitely one to whack out on those 'I look like I've had 2 hours sleep' days. 


4- The Powder: Its Tanya Burrs favourite, and its my favourite too! Of course its the Rimmel London Stay Matte Power in 'Translucent'. Usually I would cringe at the thought of powering dry skin, but this does a smashing job of keeping everything in place, blotting that pesky t-zone, but still keeping everything smooth and flake-free! And at £3.99 - bargain.


What are your favourite products to use for your 'Base'? 


xx

Read More

Share Tweet Pin It +1

0 Comments

In

A Little Bit Different: Tick Tock


I literally can't believe that it's already April. I'm not sure when but all of a sudden I feel like time started to go by really fast, and now the clocks have been put forward, the days seems to go even faster!


Not to mention that my exams are coming up way to fast for my liking... which worries me, and then I'll be leaving all my best friends and going to Uni! - super exciting but super daunting.


Although this whole thing might sound a bit cliché, it's really made me realise that we have to cherish each day, and that we can't just sit there worrying about things in future, because if anything that will just make those days come faster! 


I definitely now realise the value of time, and am going to try to make an effort to value it more, because although it might sound stupid, it's really easy to take time for granted! Sometimes I just sit in a lesson wishing the time away, or at work doing the exact same thing. Obviously there will be those days where you want the day to be over with - that's a given, but overall it's really important to realise how much potential we have to achieve great things- just in one day!


What do you think? 

xx


Picture from http://under30ceo.com/its-change-oclock-make-impact-now/


Read More

Share Tweet Pin It +1

0 Comments

In

Perfect Pout


From top to bottom: Honey, Demure and Elusive.


The original Kissable formula in 'Honey'
The matte Colourburst in 'Elusive Insatiable'

The Lacquer effect Colourburst in 'Demure'


Ahhh Revlon, my trusty lipstick provider! Revlon never lets me down, apart from that one time. And yet again they have pulled the cat out of the bag to provide us with yet another beauty, the Revlon Just Bitten Kissable Lip Balms, re-vamped, to bring us matte and lacquer finishes newly named the Revlon Colourburst Lacquer and Matte Balms.

All the shades look b-e-a-utiful, but the ones that just seemed to jump out at me were the shades Demure Réservée, number 105 and Elusive Insatiable, number 205. The first is part of the lacquer finishes, but I have to say that it really doesn't come off that in your face, it has a gorgeous shimmer to it that's subtle but noticeable. The colour is an absolutely gorgeous nude pink that will flatter most skin tones. Another thing that caught my attention, although quite trivial, was the packaging. Encased in a shiny tube that catches your eye, and looks pretty, it's quite darn hard to just walk by these....
As for the Matte finish, it's pretty much the same deal, a rose pink smooth matte, that although isn't as prettily packaged, still steps up to the mark with it's colour.

Onto the important part! How do they wear/feel? The durability of them isn't the best, not bad, but not good, they'll last you until you eat or drink a coffee/tea, but they definitely need re-applying. And as for how they feel -pretty nice! Smooth, soft and certainly not uncomfortable; although I have to say the Matte and Original formulas come off a lot smoother than the Lacquer effect, but it redeems itself with the fact that there's certainly no worry of having that horrible drying effect that makes our lips look like a desert savannah!

Another brilliant formula from Revlon, they just never let a girl down...

Read More

Share Tweet Pin It +1

0 Comments

In

M.A.C Prep+Prime


Goodbye dark circles!


I think I may finally have found a strong contender to take on the seriously tough battle that is my under-eye dark circles! I had tried a lot of different concealers- from liquid to cream, and whilst some were good, really good (Bobbi Brown- thank you!), none of them completely banish those pain's-in-the-bum! And it's no wonder because they really can be stubborn! Having eyed up the Mac Prep+Prime Highlighter for a bit - mainly in Pixiwoo's videos- I caved in and let the M.A.C lady persuade me into buying the shade 'light boost', which although quite light, cancels out the darkness nicely, whilst still matching my olive skin tone!

And it really works, like really well. I could tell the difference almost straight away after putting this on, my dark circles were almost completely gone, and my face looked more refreshed. It's super easy to use and it blends into the skin really nicely! Jot it onto the under eye in cross shape, as well as the bridge of your nose, tops of the cheekbones, forehead and chin, and viola! A nice highlighted, fresh face!

Make up staple? I think so.


I am riding the train to I-just-slept-for-ten-hours-ville, and it's awesome. 


You can buy the M.A.C Prep and Prime highlighter here: http://www.maccosmetics.co.uk/product/shaded/160/15746/Products/Face/Primer/PrepPrime-Highlighter/PrepPrime-Highlighter/index.tmpl


Picture taken from the M.A.C UK website http://www.maccosmetics.co.uk/product/shaded/160/15746/Products/Face/Primer/PrepPrime-Highlighter/PrepPrime-Highlighter/index.tmpl


Read More

Share Tweet Pin It +1

0 Comments

In

Eye Spy....


The Beautiful Alexa Chung's eye's, who has teamed up with Eyeko for her own 'Eye do' range.


I really don't know how I get roped into these purchases but it's definitely never my fault.

The other day I was just contently browsing the internet, as you do, when I stumbled across a video in which someone was talking about a brand called Eyeko, the name definitely rung a bell, so I decided to pop on over and see what it was all about! When I arrived however, I was straight away confronted with a little message of joy, that informed me I could get a free Black Magic Mascara if I signed up- I of course did this.

I spotted the 'mini's' (hell yeah) and chose to buy the Skinny Mini Liquid Liner which is a very reasonable £9! And so along with my free mascara (also a mini) it meant that my whole purchase actually only cost me £9! Because THE P&P IS FREE(!!!!!) 


So, with that good start, how are the actual products?

Well, AMAZING.

The Black Magic mascara is the best product by far, my lashes look so much more longer, and a lot more voluminous, I always swore by the Benefit They're Real Mascara, but dare I say it- I think it's got a competitor! I even got a complement on the length of my lashes the other day- something that's never happened before! The packaging of this mascara is also really interesting and actually really cool, instead of your standard hard plastic shell, this mascara is packaged in a squeezy tube type way- and it's really awesome.


As for the eyeliner, I rate it just as highly! It glides on really nicely, and the pigment is super great! I really recommend this for someone who struggles with eyeliner because it's just so easy to apply! And the great thing about both of these products is that even though they're minis, they're lasting really well! This seems like such a great a great brand, and with high ratings from the likes of Lisa Eldridge and Vogue- who's surprised?

The prices of these products are definitely reasonable when compared with the quality! The mascara's range from £15-£20, and the eyeliners from £12-£21- some really good numbers when you take into account how long lasting they are!


Overall I am so glad that I purchased these products, and I am definitely going to purchase the full size when my beloved minis run out! - I also have my eye on their Liquid Metal Eyeliner in Rose Gold.... get it? ....


Have you tried any products from Eyeko? What did you think?

xx


All images taken from http://www.eyeko.com/index.php?route=common/home


Read More

Share Tweet Pin It +1

0 Comments

In

Tackling Those Spots!


I have to say that *touch wood* I've been quite lucky with my skin that in the recent years I haven't really had bad spots, when I was 13-15 I used to get breakouts quite often, but my skin had settled and calmed and overall, hasn't really given me a headache..... until recently.

I'm going to go ahead and be honest by saying that the unhealthy eating that took place in and around Christmas is a large contributor to my skin's recent shenanigans, but I also think that it could well have been a new product that I had been using! And so after two weeks of just thinking "ahh it will pass soon", I actually started taking some steps to tackle those horrible red things on my face....


1- Find the source of what set it off: Often easier said than done, however the easiest way to get a start in this step is too ask yourself either, have you used a new skin or make-up product lately? or have you been eating differently? For me it was pretty much both of these (oops). I hadn't been eating too healthily because it was nearing Christmas and quite honestly the tin of Celebrations were WAY to tempting. Not only this, but I has also recently used a new product, the Soap and Glory Peaches and Clean Face Wash, which smelt and felt lovely, but must have had too much fragrance in for my skin. After cleaning up my eating and chucking out the face wash, the first step was done.

3- A good cleanser: For the next step I chose a Micellar Water Cleanser, the L'oreal Skin Perfection Solution is great, and so is the B. Pure Micellar Water, but lets not forget the queen of them all, the Bioderma Solution. Micellar Waters are a great way to remove make-up and tone your skin, and an excellent choice for people with more sensitive skin.

2- Find a killer spot cream: For this one I turned to A Model Recommends, I remembered being on her YouTube channel a while back watching a video of her talking about a spot cream from La Roche-Posay called Effaclar Duo, to cut a long story short, this corrective cream is a God send, I've noticed my complexion has improved and my breakouts have stopped! AND despite it's strength it was still great on my sensitive skin!

There are the three steps I took towards battling those pesky spots, and they've been a success! Goodbye spots, hello clear skin....


xxx


Read More

Share Tweet Pin It +1

0 Comments

In

Most Wanted: 2014

There are always those things you want to purchase, but for some reason, just never get round to! I think what tends to happen with me is that I think, oohh I really want that, but do I really need it? Then go off and buy something completely different- I know, makes no sense! So I thought I would make a little list of all the things that have tempted me in the beauty world, and are on my hit list for 2014! I WILL buy them this year....


The Lancôme Art Liner: Recently I've really been getting used to wearing liner as a every day staple, and whilst my Collection 24 Hour Extreme Liner does an absolutely great job, I have heard really good things about this liner, apparently it glides on really smoothly, which will be great to help me perfect those flicks!  

The Clinique Superprimer: I have, again heard so many good things about this primer, but most influencing factor is that my mum uses the brightening one, and let me use for a couple of days, and oh my! That was enough to persuade me! My skin looked and felt so smooth and I really noticed a difference in how long my make-up stayed on! 

Clarins Beauty Flash Balm: A cult classic, I think it's mostly the hype surrounding this product that has tempted me endless times to click 'add to basket'!

Tom Ford Lipstick: This is 100% Vivianna Does Makeup's fault, I saw in her new haul video how amazingly beautiful the Tom Ford lipsticks are, from the gorgeous packaging to the down right stunning colours they offer (Pink Dusk), at £36 it's going to take A LOT for me to cave in though! (Most likely will be sold if I end up near a Tom Ford counter any time soon)

Clinique Cleansing Balm: As one of my New Years Beauty Resolutions I vowed to take more of an interest in skincare and thus look after my skin more! And I plan to do just that... with the Clinique Cleansing Balm! I've been curious about this for a while, simply because it seems like a nice effective way to take off my make-up fast, but still take care of my skin. Along with this product I'd also really like to try the Clinique Dramatically Different Moisturiser 

A M.A.C 117 Blending Brush: Although this brush isn't exactly a hugely luxurious or hard-to-get-hold-of make-up item, for some reason I just never pick it up when I'm in a M.A.C store! I really need another blending brush for my eye shadow, since my Smashbox one's gone AWOL (aka madly puffed up).

The Smashbox Full Exposure Eye Shadow Palette: I'm not sure whether it's the whole 'three looks for every eye shape to make them look amazing' thing or just the amazing colours that tempt me so much, all I know is that I really, really want this palette!!!! 


Have your tried any of these? If you have I would love to know what you though of them! 


xx


Products available from:

http://www.clinique.co.uk/
http://www.lancome.co.uk/
www.maccosmetics.co.uk
www.smashbox.co.uk
www.selfridges.com/en/Beauty/Brand-rooms/Brands/TOM-FORD/Cosmetics/Lips/Lip-Color_450-3001058-LIPCOLOR/
www.clarins.co.uk


Read More

Share Tweet Pin It +1

1 Comments

In

Rest & Rewind


Candles are such a nice way to create a really nice cosy atmosphere in any room! Not only that but I think there's nothing better than if you're feeling stressed or tired to light a really nice scented candle, it just helps to relax you - and not to mention make your room smell amazing! 


For my Birthday one of my friends got me this Yankee Candle in the scent 'Mandarin Cranberry' and it's smells sooo good! It's this lovely sweet, but not overpowering smell, I've used it so much and I think I'm going to run out soon!

I think the next smell I'd like to try is 'Salted Caramel' or an apple/cinnamon one! I know that apple/cinnamon scents are usually a chrsitmassy smell, but I personally love that kind of smell any time of the year! 


What's your favourite candle scent? 


xx

Read More

Share Tweet Pin It +1

2 Comments

In

My Beauty New Years Resolutions!


Happy New Year! (I'm sorry that's WAY overdue!)


I know that, as I said, this is way overdue, but along with my new years resolutions I have had time to think about some beauty resolutions too, and I came up with two main ones that I am going to try to stick to! So here they are, my (late) beauty new year's resolutions!

1- Take care of my skin better: Okay, hands up, I'm not the best when it comes to taking full care of my skin! I make an effort to take my make-up off and look after my skin, but I never really went any further apart from the typical moisturiser. I always just used to take off my make-up with a cotton pad and some Aqueous Cream, and that was it, but now I am vowing to invest in some nicer products, and gain more of an interest in skin care! I have done quite well so far, now I always start with using my Peaches and Clean face wash by Soap and Glory, after I've removed some of my make-up with, I move onto my L'Oreal Skin Perfection 3 in 1 Purifying Micellar Solution to make sure that all my make-up is off, and then after that I moisturise, I really love the Clinique Dramatically Different moisturiser. As well as that, once a week or so I'll use my Clinique 7 Day Facial Scrub - silky smooth!

2- To give my hair some more lovin': This pretty much goes the same as my skin care! Although I must say I do like a good ole' hair conditioning mask! I always used to be really into hair products, and techniques, but recently I've kind of slipped into a rut. So I've decided that I'm going to start looking into more hair products, and experiment with more styles and updo's this year, I'm really bad when it comes to experimenting with different hair styles, I pretty much do my hair the same way everyday! My plan is find a nice colour for my hair, get a nice cut and find some great products! One that's definitely on my is the Oribe Dry Texturizing Spray!


So those are my main beauty resolutions for 2014! What are yours? - beauty and general!


xx


Picture taken from: http://erabegin.com/happy-new-year-gif-images/

Read More

Share Tweet Pin It +1

0 Comments

In

The Beauty Basket: My Most Used


Recently, I've been saving for a holiday with my friends in the summer of this year, now as exciting as this prospect is, it does mean I have had to save on my make-up purchases (sniffle). However, this is not entirely a bad thing at all, because it means that I've been reaching out to a few old classics, those products that I find my self reach for everyday!

Rimmel Wake Me Up Foundation: This is a really great foundation, and I find myself using this practically every day, it gives me a really nice glow, which is great now that I'm back at sixth form and don't get as much sleep! I do find that sometimes it can, come off a little easier than some foundations, but with a sweep of my next product, everything is staying put and glowy throughout the day!

Rimmel Stay Matte Powder: The classic! Tanya Burrs favourite, and many other beauty gurus out there too, and now, my favourite! At first the title put me off a little bit, as with dry skin I tend to stay away from the 'mattifying' products, and cosy up with the dewy ones, but this it the perfect balance! Keeps my foundation from going walkies, but still lets the glow of the foundation squeeze through.

M.A.C Pro Longwear Concealer: I kind of ditched this concealer for a bit, and I don't really know why! But recently I tried it out again and just fell in love with it, as the name suggests it has a good amount of wear-time, and the coverage is really great too. I'm definitely glad that I reached to this again!

Bourjois Colour Boost Lip Crayon, in Peach on The Beach: This is such a good colour to wear for every day, a gorgeous peachy pink colour, that really does last a long time, on a daily basis and whenever I'm in a rush, I'll just sweep this on, and I'm ready to go!

Urban Decay Naked 2 Palette: I think it must have been the hype surrounding the Naked 3 Palette, but recently I have been using this palette all the time, my favourite colours to use on an everyday basis are 'Bootycall' with a bit of 'YDK' in the crease and outer corner, or the same with 'Foxy' and 'Tease'. I forgot how great this palette is and now whenever I put on shadow day or night, it's nearly always from this palette!

Collection Extreme 24 Hour Felt Tip Liner: I always shied away from eye liner for a while, because I could never really get the flicks right, but practise makes perfect, and now I use this A LOT! It lasts a really long time, and the felt pen is nice and thin, so it's great for an easy everyday liner!

I really love these products, and I'm definitely grateful to have re-discovered them! Do you love any of these products too? What are you always reaching for in your beauty box?


xx


Read More

Share Tweet Pin It +1

2 Comments

In

Good Music Month!


There's been a lot of good music around recently, and I think one of the best albums that has been released is the surprise which was the NEW BEYONCE ALBUM (!!!!!!!!)

Beyoncé released this album, as a complete surprise, with no promotion at all, and literally sent all her fans (me included) into a frenzy. 

I absolutely love this album, it's the best she's ever released, and I literally love every song! It's much different from anything she's ever released, but still, of course, amazing!

My favourite songs are : Flawless, Drunk In Love, Mine and Haunted! Oh and Partition! And Pretty Hurts.... Pretty much all of them....


Do you like her album too? What's your favourite song(s)? What songs/albums have you been loving this month? 


xxxx


Read More

Share Tweet Pin It +1

1 Comments

In

A Lush Bath


Hmmm, I love a winter bath! Just thought I would do a small post on the bath bomb I used from Lush!
It's called Candy Mountain and it smells delicious! If you haven't smelled it already, it smells very similar to the popular Lush shower gel called 'Snow Fairy', and if you haven't smelled Snow Fairy, it basically smells of bubblegum and happiness! 


As you guessed from the name- it looks like mountain! And it's a lovely pink and white colour! Very candy like- yum!


AND IT TURNS YOUR WATER PINK!!!!


This is such a lovely bath bomb! It smells absolutely delicious and you come out your bath smelling of it all evening/day!


What's your favourite bath bomb?  


xxxx


Read More

Share Tweet Pin It +1

7 Comments

In

How to: Get Smooth, Styled Hair, With And Without Heat!

(A pre-warning, get a lovely cup of tea, or a beverage of your preference, a nice snack, and relax, because this is a LONG post!)


It always a constant battle that we have to fight : How to I style my hair, with heat - whether that be with just a hair dryer, or straighteners, curlers or all three! - but still keep my soft and not looking like straw? It's a toughie, but I think I have found some products and methods that can at least help to keep that damage at bay!

Now I know a lot of people's answer to this question is- Well just don't use heat? But some people who perhaps have thick hair, curly hair, thin hair, frizzy hair etc whilst still using a few non-heat methods, do still need to, or feel more comfortable, using a hair dryer or a pair of straighteners to tame that darn frizz!

I have very curly, long, sometimes frizzy hair, so it's safe to say that I have had my fair share of figuring out ways to keep my my hair soft, shiny and smooth with out the damage that sometimes comes with it! Now that doesn't just mean that the methods I write are only aimed at curly-haired people! I think these methods will work for anyone with one of the hair types mentioned above!

Phew, that was a long introduction- so anyway!

So! I have devised a list of methods for each option : Non-heat methods, and Heat methods! For each method I'll choose a tool and product(s) which are good for it!

Let's start with the Heat methods:

         1- Tool: Diffuser

          Why? Diffusers are good for curly hair because they control the amount of air that comes out the hair dryer and the speed at which it comes out, this means that your hair will be less frizzy at the end because it hasn't been blown around to vigorously! It also allows you to scrunch your hair, which means you get more defined curls- with less frizz.

         Products:  Garnier's Hair Oil - I purchased this in Germany, and I don't actually think this is available in the UK, so I also like to use the L'Oreal Paris, Elvive Extraordinary Oil which is available in the UK! Hair oil's smooth the hair and help to repair any damage that may have already occurred, I put mine on when my hair is damp, and if it needs that extra bit of smoothing, after drying it too!
                        Trevor Sorbie Beautifully Straightened Smoothing Balm- Even though this products is most likely designed to be used on hair that's going to be straightened, I think it's great to use just for blow-drying as well, because the ingredients are designed to prepare the hair for straightening it keeps the frizz at bay and smooths the hair!

       2- Tool: Round Brush

        Why? This tool helps to create volute at the roots of your hair and also smooth it out. It's best used on small - medium sized sections of hair, start at the roots and lift it upwards whilst focusing the heat of the hair dryer onto that particular section!

      Products: Umberto Giannini Volume Blow Dry Spray: I love this product! It creates really nice volume when sprayed into damp hair at the roots and body of the hair!
                     Tresemme Heat Defence Styling Spray OR Aussie Take That Heat Balm: Both of these are absolutely brilliant heat protectors! I think even though heat protection is necessary for all styles, this one especially requires it because the heat is much more concentrated on your hair than, say, just blow-drying it! Both also help to smooth and de-frizz hair (especially the Aussie product!).
                     L'Oreal Elnette Hairspray: There are quite a few variations of the Elnette hair sprays, and I'm sure all of them are brilliant! The ones I usually use are the Volume one and the Flexible Hold product! It's important to hair spray this style after to keep your do' in place all day, keep it smooth, and minimise frizz!

        3- Tool: A Curling Wand, The Babyliss Pro Curling Wand is very good OR  a heated roller set The Babyliss Heated Roller Set is also very good! This method of styling is great for curl and straight hair! For straight hair it great to add some body to hair, and if you fancy having some tight ringlets you can curl small, frequent strands of hair, whereas if you're after loose waves just take bigger sections! For us curly-haired girls, they're great for just defining those curls that go a little flat or frizzy overnight!
                             Another tool that is brilliant for when you curl your hair, is a natural bristle brush, ever wonder how celebrities get their hair to look like this?


Quite often is it by either curling the hair with a wand or rollers, then brushing it through with a bristle brush (and a whole lot of skill). I'd say this type of brush is still great to use on curly or frizzy haired people, because is smooths it, as opposed to making it static. I can use it on my hair, and it usually just goes puffy when I brush it!


                                           Products: A hair Oil (again) 
                                                         .... And of course HEAT PROTECTIOOOONNN (Again!)
                                                          Another product which is also great is the Umberto Giannini Curl Friends Natural Curls Styling Spray, this is great to create that natural curl in your hair before you blow dry it, and it will also help to hold the curl for longer in the day! 


Okay! So that's the heat methods! Now onto the heat-free methods!

  1.  Tool: First up is my recent discovery and thus, obsession! I discovered this beauty one day while walking through the Bullring Shopping Centre in Birmingham, when I was stopped by a lady at one of shop-stands which was called 'Aria Beauty', she told me about this hair curler (the 19mm Curling Wand) that used Negative ion technology and far-infared heat, this basically means - NO HEAT DAMAGE (!!!!!!!!!!!!!!!!!!!!!!!!!!!!!!!!!!!) Or very little (basically none!) Now I know this sounds absolutely ridiculous, but I can vouch for this, when you use this curler on your hair, it actually feels smoother and softer after you've used it, like seriously, I have used this for about a week now, not long I know (I'll do an update in a few weeks time), and my hair is in great condition. Can we also talk about the fact that it literally takes seconds to curl all your hair, like seriously, by the time you have finished wrapping your hair around the barrel, you take it off and you have the most amazing ringlet EVER. AND the curls stay in place all day, and I know a lot of brands claim this, many a time have I thought "Oh great!", only to find that curls have gone by the end of the day, but this doesn't happen with the Aria Curling Wand, even in RAIN (which would usually end in a frizzy, puffy disaster for me) they lasted perfectly fine! So basically, this curler is perfect.
          This curler, is of course perfect for both curly and straight hair! I use it on my curly hair to define my curls and smooth them, as well as make them last longer! 

          Products: Even though the risk of heat damage is minimal, I still like to use protectant! Just for that comfort! Really, now I don't really use anything else on my hair, I don't even blow-dry it any more, I simply wait for it to dry naturally, use a little bit of hair-oil, and then spray my hair with with the heat-protectant, and voila! On with the curling! And perhaps a bit of hair-spray to hold the curls in place! I like to do this the night before and sleep on the curls over night! 

       Get the Aria Beauty Curling Wand here: http://www.ariabeauty.com/, or here: http://www.amazon.co.uk/s/?ie=UTF8&keywords=aria+beauty&tag=googhydr-21&index=drugstore&hvadid=25771389536&hvpos=1t2&hvexid=&hvnetw=g&hvrand=2135329852131861187&hvpone=&hvptwo=&hvqmt=e&hvdev=c&ref=pd_sl_6oin3ht8j0_e Aria does a range of styling products all using the same heat-technology! Wooopppee! The straighteners are AMAZING too! Just everything is....

  2. Second is a way of getting some nice smooth waves in your hair over night!
      Tool: A hair-band, and possible another pair of hands.... This method is quite basic! It's a plait! If you like to get some nice waves in your hair, without the heat, then a really good way of getting those heat-free waves, is by plaiting your hair over night! For curly hair, I would recommend plaiting your hair in a tight, normal plait, however for straight hair, I would recommend plaiting it in a French-braid (it will help to curl it more). If you have straight hair, you can put your hair in a French-braid either dry or wet, but if you have curly hair I would recommend plaiting dry hair. 

                Products: A good spray to use after letting the plait set is the VO5 Give Me Texture Dry Texturing Spray, OR the Schwarzkopf Got2b Beach Matt Salt Spray, to get that nice just-came-from-the-beach-look!

  3. Tool: Velcro rollers! Now this is not one that I personally would recommend, but it has been tried many times by my best friend! She usually semi-dry's her hair and then puts her hair in rollers overnight; using big sections for a straight, wavy-ish look, and smaller sections for a voluminous-beachy-wavy-awesome look, she takes the section and rollers it under! If you're a bit unsure of the grip of the roller while you sleep, you can a bobby pin to secure it in place! It looks really nice, but the only thing is that it's not very comfortable to sleep on (If anyone has a good suggestion of how to do this method, and still sleep comfortably, then please comment how!) Some good rollers are the Superdrug Self Stick Rollers, in small or large!

                  Products: For a way to keep those waves smooth in the morning, I recommend a hair serum, Tresemmé Salon Smooth Serum is a good one! Also, it's a good idea to hair-spray your hair when it's in the rollers, for extra hold and style!


So there we have it! PHEW that was a big post! I really hope you enjoyed it, and if you tried, or like me, really like any these methods, let me know! Also, what methods do you use? Let me know!!!!


                                                      xxxx


Picture of Lana Del Rey taken from: http://snowbrains.com/music-mondays-lana-del-rey/


Read More

Share Tweet Pin It +1

0 Comments