 |
| Here's my face, with it on...... |
Can I get a hallelujah because honeeyyyyy, I've found the holy grail foundation.
Recently I had struggled with some pretty serious break outs due to coming off the pill (I'm talking actual break outs, not the kind where they're like 'guys I need to cover some acne' and by that they mean two pin size red dots). This lead to a blood thirsty hunt for the most high cover foundation I could find. I remembered back to when my skin was as clear as my conscience pre-uni, back to when I loved the Make Up Forever Ultra HD Foundation, it's such a beautiful finish, but I needed something more high coverage than that! Que watching one to many Nikkie Tutorials and Jeffree Star videos and I was sold on the Make Up Forever Ultra HD Foundation Stick.
I spoke to the make-up artist, who told me that essentially one layer of the foundation stick equates to about two layers of the liquid version. He did, however, mention that the liquid foundation was much better suited to oily skinned gals and guys, whereas the foundation stick would be better for the normal to dry skin people out there. I can fully support that statement (which we'll get to in a minute).
The product retails for £29, and you get your standard 30ml. Is it worth it? Umm yes.
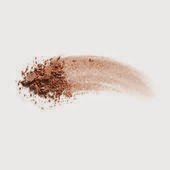
What I mainly love about this foundation are two things, it's coverage and it's finish. This foundation has amazing coverage, it covered all my redness and my acne scars, one thing to note is that because it is quite high coverage it's important that you get the right shade (I am shade 153). The finish on this foundation is one that I have yet to find in any other foundation, you literally glow, it's such a reflecting foundation that even if there was a slight bit of pigmentation showing, as soon as light hit it it wouldn't be visible anymore. This is honestly jut the best finish I've ever found in a foundation and it translates beautifully in all lighting, as well as in photos.
Of course nothing is absolutely perfect, so there are some slight downfalls to this foundation. The first is that this foundation runs out mega fast, at first I thought it was just me, but after having read up on it a little it does seem to be noticeable. I don't know the cause of this but my guess would be because of the solid form of the foundation. After using this every day I can confidently say that it ran out substantially faster than my other foundations, and at £29 per pop it's not exactly something that fine to pick up every few weeks. So this might be one to pop to side for special occasions, or even mix with a cheaper counterpart. The second is that this foundation is straight up going to need heavy powdering if you have oily skin, I remember when I originally purchased this foundation I didn't powder one day and I literally turn into an oil slick by the end of the day, now because of the beautiful finish of this foundation I was able to pull it off as more of a ridiculous glow, but yeah, I have normal skin so I can't even imagine what that would have looked like on someone oilier than me!!
So there it is! I absolutely love this product, and it's definitely one I will always come back to!
I hope this review was helpful! Let me know if you've purchased this foundation and what you thought!
xxxx
Recently I had struggled with some pretty serious break outs due to coming off the pill (I'm talking actual break outs, not the kind where they're like 'guys I need to cover some acne' and by that they mean two pin size red dots). This lead to a blood thirsty hunt for the most high cover foundation I could find. I remembered back to when my skin was as clear as my conscience pre-uni, back to when I loved the Make Up Forever Ultra HD Foundation, it's such a beautiful finish, but I needed something more high coverage than that! Que watching one to many Nikkie Tutorials and Jeffree Star videos and I was sold on the Make Up Forever Ultra HD Foundation Stick.
I spoke to the make-up artist, who told me that essentially one layer of the foundation stick equates to about two layers of the liquid version. He did, however, mention that the liquid foundation was much better suited to oily skinned gals and guys, whereas the foundation stick would be better for the normal to dry skin people out there. I can fully support that statement (which we'll get to in a minute).
The product retails for £29, and you get your standard 30ml. Is it worth it? Umm yes.
What I mainly love about this foundation are two things, it's coverage and it's finish. This foundation has amazing coverage, it covered all my redness and my acne scars, one thing to note is that because it is quite high coverage it's important that you get the right shade (I am shade 153). The finish on this foundation is one that I have yet to find in any other foundation, you literally glow, it's such a reflecting foundation that even if there was a slight bit of pigmentation showing, as soon as light hit it it wouldn't be visible anymore. This is honestly jut the best finish I've ever found in a foundation and it translates beautifully in all lighting, as well as in photos.
Of course nothing is absolutely perfect, so there are some slight downfalls to this foundation. The first is that this foundation runs out mega fast, at first I thought it was just me, but after having read up on it a little it does seem to be noticeable. I don't know the cause of this but my guess would be because of the solid form of the foundation. After using this every day I can confidently say that it ran out substantially faster than my other foundations, and at £29 per pop it's not exactly something that fine to pick up every few weeks. So this might be one to pop to side for special occasions, or even mix with a cheaper counterpart. The second is that this foundation is straight up going to need heavy powdering if you have oily skin, I remember when I originally purchased this foundation I didn't powder one day and I literally turn into an oil slick by the end of the day, now because of the beautiful finish of this foundation I was able to pull it off as more of a ridiculous glow, but yeah, I have normal skin so I can't even imagine what that would have looked like on someone oilier than me!!
So there it is! I absolutely love this product, and it's definitely one I will always come back to!
I hope this review was helpful! Let me know if you've purchased this foundation and what you thought!
xxxx


.jpg)


.jpg)
